To construct a riding arena or paddock? With the help of the paddock grids from EasyGravel, it's always achievable. Below, you'll find the guide on how to do it. Step by step, we'll take you through the steps you need to follow. If the ground is very wet, we advise you to contact a specialist and equip the riding arena or paddock with drainage pipes.
Step-by-Step Plan
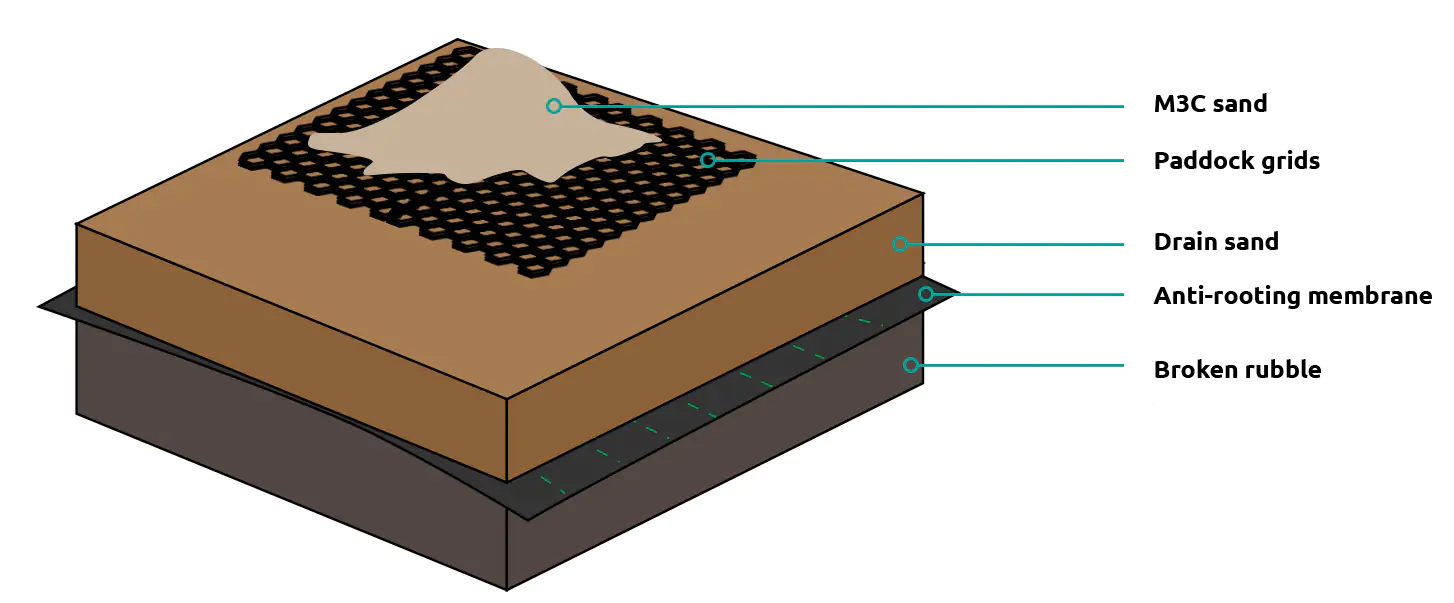
1. Level the ground and apply geotextile or anti-weed fabric over the entire surface.
2. In the second step, apply the (drainage) sub-base, the thickness of which depends on the ground. If it's a well-draining soil, a sub-base of 0-10cm is sufficient. If it's a soil that retains little water, we recommend a sub-base of 10-30cm. This layer could consist of drainage sand or a fine gravel type. Level the ground again.
3. The paddock grids are equipped with a click system, making it easy to click the plates together. Ensure that the paddock plates are not exposed to direct sunlight to prevent expansion. Temperature differences can cause the plates to shrink or expand, so make sure you stay 5 cm away from the edge or fence.
4. Finally, apply the top layer consisting of M3C sand. This top layer should be 7-15 cm thick. M3C sand has the right grain size and water permeability. The plates should always be covered with a few centimeters of sand. For paddocks, horse walkers, and paths, we recommend about 7 cm of sand, and for riding arenas, 10-15 cm.

Interested in constructing a paddock? Check out our paddock grids.


